
A Self-Updating, Serverless MCP Server For Your Dev Team
Using VS Code's June 12th Update, this might be the coolest STDIO approach out there 🔥


The following is an excerpt from my book on “Building MCP Servers with OAuth.” If you enjoy this content, consider buying it early for up to 50% off, once completed in July I will increase the price.
The section I’m sharing today from the book highlights a unique approach to sharing MCP servers across your development team. Right now on my team, we are wanting to share more of our prompts, but we do not want to setup an internal server. We want something simpler, with the full customization and control that an MCP Server offers.
This chapter assumes you have the latest version of VS Code and bun.sh installed.
With that being said, let’s take a look at the chapter:
Making our first MCP server.
We will be taking advantage of bun.sh’s watch mode, and one other feature, so we are able to share this internally with our dev team, and ensure it’s always up to date. This comes without the hassle of hosting an internal HTTP Streaming server. Keep reading to find out how this is possible.
First, make sure you have Bun installed, and then create a blank project using `bun init`. Run `bun add @modelcontextprotocol/sdk` then replace the contents of index.ts with the following:
import { McpServer } from "@modelcontextprotocol/sdk/server/mcp.js";
import { z } from "zod";
import { StdioServerTransport } from "@modelcontextprotocol/sdk/server/stdio.js";

const server = new McpServer({
  name: "My MCP",
  version: "1.0.0",
});

server.prompt("one-shot-task", { task: z.string() }, ({ task }) => ({
  messages: [
    {
      role: "user",
      content: {
        type: "text",
        text: `Please attempt the following task, and once done, commit it for me with a message that makes sense:\n\n${task}`,
      },
    },
  ],
}));
const transport = new StdioServerTransport();
server.connect(transport);
This creates a basic server, and registers a single prompt. This prompt uses Zod to validate the inputs from the language model and ensures a task string is passed in to the prompt. This is how the official protocol from Anthropic ensures required inputs are passed in from the MCP client.
Essentially, anyone who installs our MCP server, can choose the "one-shot-task" prompt, pass in a task, and then the user's AI model will run the full prompt with our task.
Adding our MCP to VS Code
The support for prompts was only added on June 12th, 2025 to VS Code.
You're going to start by bringing up the "Command Palette" in VS Code. Search the "Help" bar at the top if you are not sure how.
We will then search for the following:
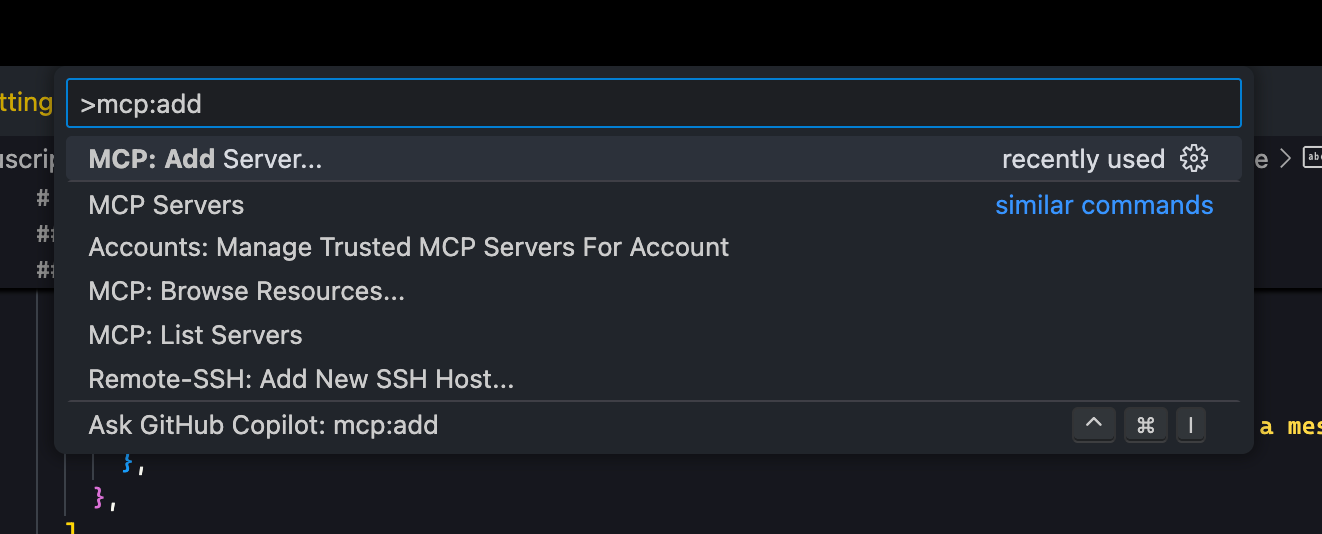
Hit enter.
Choose stdio:
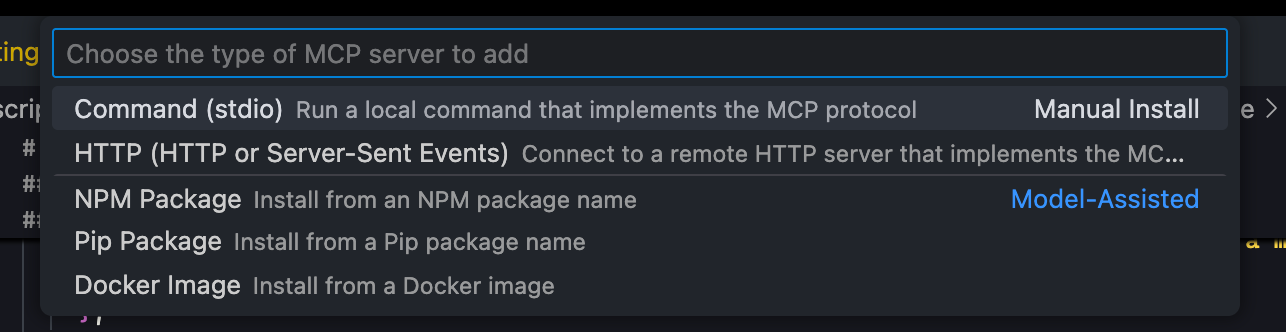
For the command to run, type in
bun run --watch ~/projects/mcp-book/index.tsYou must correct the path to where you created this file on your computer
On Linux or Mac, you should be able to type `echo $PWD` to get the full path when inside of your `mcp-book` folder.
Name it "my-stdio":

Finally, open the "Chat" tab (use the help bar on top) and start typing `/one`

When you hit enter, you will see a prompt for the "task" string value we added in our code:
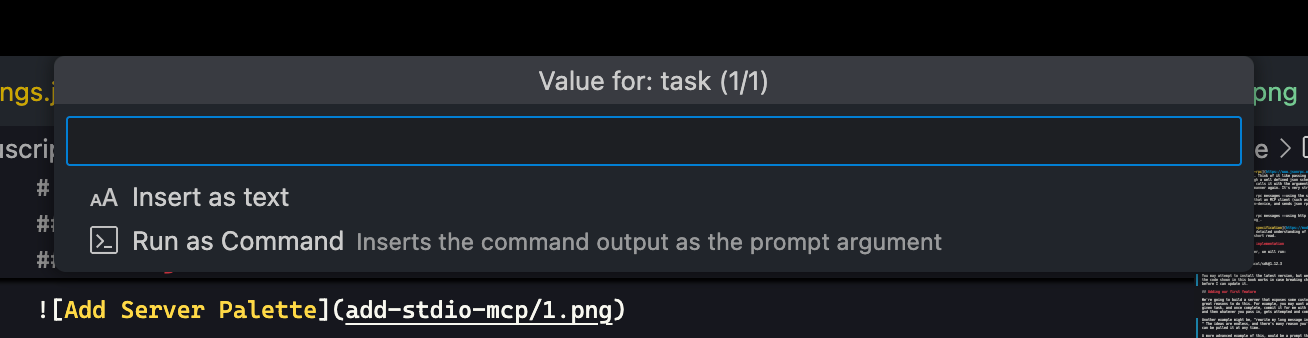
I inserted "finish my book" at which point, the Chat content is replaced by the prompt generated from our server!

This is really awesome, as we can add this same server to Claude Code, Claude Desktop, Cline, and many other tools. There's more AI tools by the day that support this specification.
Although as of writing this, only VS Code supports using prompts defined by MCP servers.
We are able to bring our prompts to any tool, without having to define prompt files according to every tool's own specification.
Not to mention, we can make very powerful ones. Imagine one that fetches the current stock price within the prompt to let you know if you should take action today.
Let’s also consider one that pulls in internal data sources and outputs a visualization.
The possibilities are endless compared to hard-coded prompt files.
You may be wondering, why not use an MCP tool for this? I believe simpler is better, until it no longer works.
With the prompt setup, you can modify it before running it, and have total control on the client side. I would start with this until you are needing more.
If you have common, specific tasks, prompt files work well if you have more general tasks, generic tools will work better and be worth the additional code.
Making this sharable with your Dev Team
Since we are using bun... we can do something really neat now.
Let's say we want to share these prompts with our dev team. **There's two problems with using the STDIO transport**. What if one team member adds a new prompt? You will not see it until you manually pull in their code and attempt to restart your MCP client.
We could setup an HTTP Streaming transport for our internal team, but then we need to deploy to a shared server and make sure any updates are released to it automatically. That's too much work in this scenario.
There's a much nicer solution. First, we already added our server using the `--watch` flag. This means if any code changes, bun will reload the process for us.
Next, all we need to add is a few lines of code at the bottom... like this:
import { $ } from "bun";

setInterval(async () => {
  try {
   await $`git pull`
  } catch (err) {
    console.error("Failed to run git pull:", err);
  }
}, 60 * 5000);
This will run a git pull every 5 minutes. Bun will reload the process, and we will have the latest code. Realistically you could change the timeout to be longer, but this is a good solution to keep your team members up to date with future prompts and tools that you may add later.
Now you can `git init` and push a repo up. Ask your teammates to pull the repo and add the stdio command just like we did.
If you don’t like this fancy recurring interval, you can manually pull inside your mcp server repo when you want to pull in the changes.
Anyone on your team can add and modify prompts, push to the main branch in git, and within a few minutes, your teammates will have the latest code, no shared server required.
At my workplace, I am attempting an approach like this to collaborate on standard prompts we want to use as a team, as well as exposing tools we want to use together.
This is a good point for you to play around, make a few more prompts, and get ready for the next section, where we will add HTTP Streaming, and later on, learn about the other features of the MCP specification.
If you enjoyed this post, please consider purchasing at an early discount, or subscribing for more chapter drops.